Iris detection is significantly more difficult than pupil. Mostly because it is not so well defined, pupil is just a black disk essentially as far as a grayscale image is concerned, but the outer edge of the iris is not nearly as sharp as the outer edge of the pupil is. Also, there is a much higher probability of glints and reflections in the iris, since it is larger than the pupil and this can complicate the detection further. And on top of all that the upper and lower eyelids often cover up portions of the iris, which means that detecting the iris as a circle is going to be either difficult or impossible.
Despite all of these obstacles we have to do it somehow, so for this work, we are going to use the following:
- Start off with pupil location
- Smooth down the image using median filter
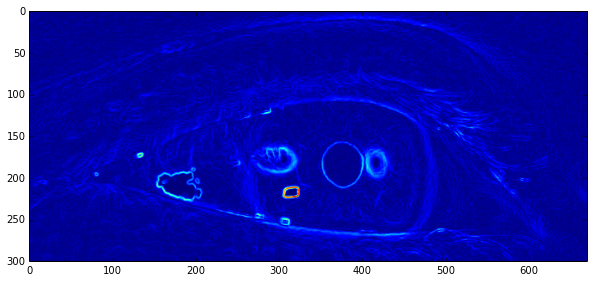
- Calculate Gradient Image
- Sample lines from the pupil outside
- Vote for the radius with greatest color change
- Draw the iris estimate
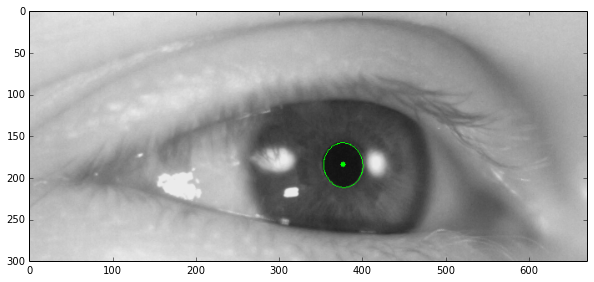
We begin with the location of the pupil as determined by the Pupil Detection. The iris detection technique presented here is relying on the corectness of the pupil detection. It therefore very important for the pupil detection to be correct.
def getOrientationAndMagnitude(image, show=False):
    sobelHorizontal = cv2.Sobel(image, cv2.CV_32F, 1, 0)
    sobelVertical = cv2.Sobel(image, cv2.CV_32F, 0, 1)

    h = sobelHorizontal
    v = sobelVertical

    orientation = np.empty(image.shape)
    magnitude = np.empty(image.shape)

    height, width = h.shape
    for y in range(height):
        for x in range(width):
            orientation[y][x] = cv2.fastAtan2(h[y][x], v[y][x])

    magnitude = cv2.magnitude(h, v)

    return orientation, magnitude
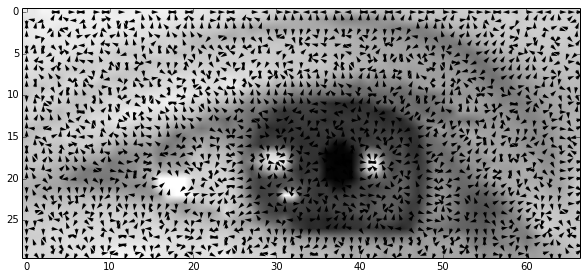
We know that the iris is going to be somewhere aroudn the pupil, so to get its radius, we are going to first get a couple of samples (lines that go from the center of the pupil) and then we are going to find the place where the change in intensity is the right orientation and magnitude. To be able to do that, we first need to calculate the orientation and magnitude fields of the image. That is what you can see above.
def getCircleSamples(center=(0, 0), radius=1, nPoints=30):
    s = np.linspace(0, 2 * np.pi, nPoints - 1)[:-1]
    # print(np.sin(s))

    s = filter(lambda x: np.abs(np.sin(x)) < 0.7, s)

    # points
    P = [(  radius * np.cos(t) + center[0],
            radius * np.sin(t) + center[1],
            np.cos(t),
            np.sin(t)) for t in s ]
    return P
This function returns a list of tuples, each representing 2 points that delimit a line going from the center of the circle outwards in regular intervals.
def getLineCoordinates(p1, p2):
    (x1, y1) = p1
    (x2, y2) = p2

    points = []
    issteep = abs(y2 - y1) > abs(x2 - x1)
    if issteep:
        x1, y1 = y1, x1
        x2, y2 = y2, x2
    rev = False
    if x1 > x2:
        x1, x2 = x2, x1
        y1, y2 = y2, y1
        rev = True
    deltax = x2 - x1
    deltay = abs(y2 - y1)
    error = int(deltax / 2)
    y = y1
    ystep = None
    if y1 < y2:
        ystep = 1
    else:
        ystep = -1
    for x in range(x1, x2 + 1):
        if issteep:
            points.append([y, x])
        else:
            points.append([x, y])
        error -= deltay
        if error < 0:
            y += ystep
            error += deltax
    # Reverse the list if the coordinates were reversed
    if rev:
        points.reverse()

    retPoints = np.array(points)

    return retPoints
This function converts the coordinates of two points into a list of points that lay on the line between the two points. We will evaluate the gradient along this line, and for that we need a list of positions where to look.
The final algorithm has been removed at the request of the ITU.
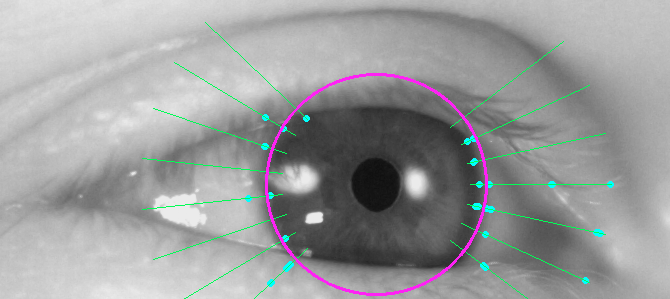
Now to put it all together, we start with orientation and magnitude maps. Then sample the original image to get lines from the pupil out. We loop through these samples and find places where the gradient magnitude and orientation is just right and then add a vote for the radius at that location. In the end we just grab the radius with the most votes and draw an ellipse around it. In the image below, the purple circle is the estimated iris radius, the aqua circles are votes and the green lines are samples. You can see that the lines don't cover the whole circle. That is because it is probable that eyelids will cover top and bottom portion of the iris and therefore interfere with the algorithm, so we only consider the horizontal samples, as defined by sin(x) < 0.7.
This is it for the iris detection, next time we'll look at unwrapping the iris to form a rectangular image.
This post is also available as an iPython Notebook